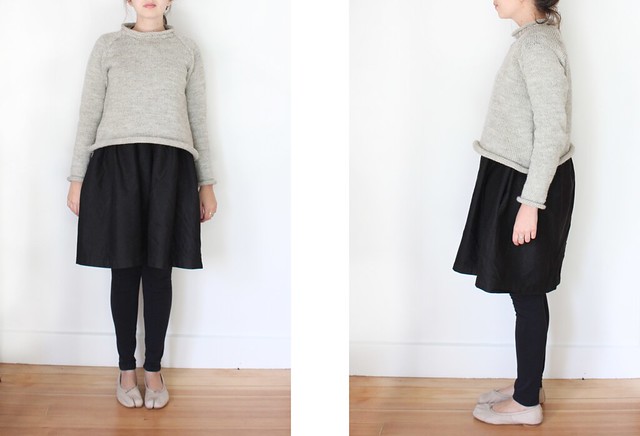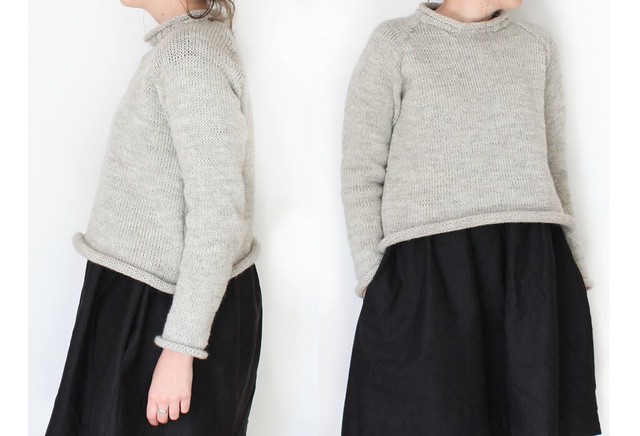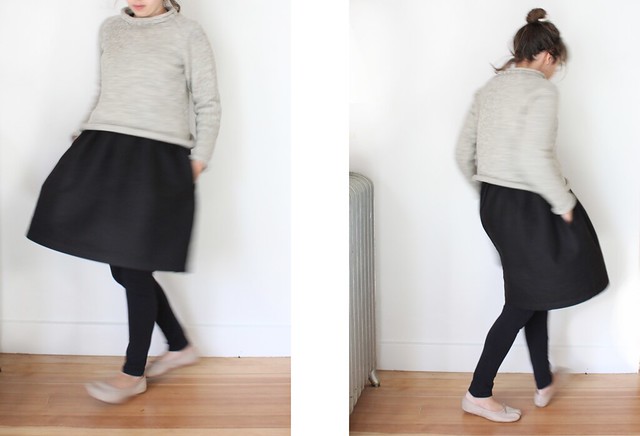


Thanks so much for all your encouraging comments about the sweater - here is the finished product! While I hadn't started with the idea of making such a cropped sweater, that's what ended up happening! I usually steer clear away from most cropped things because high-waisted anything is not a look I can pull off. But I'm starting to think I like the look of baggy cropped sweaters - is that weird? They seem really layerable. I ended up doing both a ribbed and rolled neckline (ribbed to give it a little more height and rolled on top of that because that's what I really wanted in the first place. The one thing I'm really bummed about is the armscye. When ever I knit anything I get a really baggy armpit and it drives me crazy. I suppose I just need to keep working on it!
I decided to write up my pattern below, both to share it and also so I don't loose it- as I tend to forget how I did something within about a week of finishing it. I'm writing it up in hand knitting "style" not machine knitting. I apologize in advance if there's any confusion relating to the sides that increases or decreases occur on. This is mainly because on the knitting machine everything is done on the purl side - and in knitting I know these things are usually worked on the knit side, except in sharply decreasing areas where things are worked on both sides. When in doubt, just do what makes most sense to you! On a side note, please note this pattern is for personal use only.
Rolled Hem Sweater Size S/M
Materials:
+ 3 skeins of Lion Brand Fisherman's wool (you will only need a little of the third skein).
+ Pair of Straight needles and circular needles for the neck. I made this pattern for the knitting machine and don't know what size needles you will need - my guess is it would translate to between a 6-8 US needle, but I'm not sure. The gauge I worked with was : 1"= 4.5 st and 1" = 6 rows.
+ Darning needle
+ Sewing Machine - or you can hand sew the flat pieces together.
+ Scissors
Back
Cast on 100 sts. Knit in Stockinette stitch for 2" ending on the wrong side. Dec. 1 st on each side of every 13th rows 6 times. (Or decrease every 2.25"). 88 Sts remain.
Raglan decreases
The next part we played with differently and came up with from scratch without using a knitting calculator. So, it's a bit longer than it has to be, but in short you are going to drop 44 sts over the next 45 rows.
Row 1: Dec 1 St at Beg. and End of each row
Row 2: Knit 1 row of St. St.
Row 3: Dec 1 St at Beg. and End of each row
Row 4: Dec 1 St at Beg. and End of each row
Row 5: Dec 1 St at Beg. and End of each row
Row 6: Knit 1 row of St. St.
Row 7: Dec 1 St at Beg. and End of each row
Row 8: Dec 1 St at Beg. and End of each row
Row 9: Dec 1 St at Beg. and End of each row
Row 10: Knit 1 row of St. St.
Row 11: Dec 1 St at Beg. and End of each row
Row 12: Dec 1 St at Beg. and End of each row
Row 13: Dec 1 St at Beg. and End of each row
Row 14: Knit 1 row of St. St.
Row 15: Dec 1 St at Beg. and End of each row
Repeat this pattern 2 more times. 22 Sts Remain - Put on stitch holder or cast off - your choice! (You will pick them up later when you do the neckband).
Front
Follow the directions for the back until you have completed 37 rows of the raglan decreases (Rep above pattern 1-15 twice and up to row 7 of the Raglan Dec. pattern - end with Dec 1 St at Beg. and End of each row). 44 Sts. remain. Put 14 middle Sts. on holder.
I worked the left side of the neck first. I refer to the raglan arm side as "A" and the neck side as "B" in the following chart. A + B should be worked at the same time. When I write St. St. that implies no decrease are to be made, just normal Stockinette stitch.
| Row | A | B |
|---|---|---|
| 1 | Dec. 1 | Dec. 1 |
| 2 | St. St. | Dec. 1 |
| 3 | Dec. 1 | Dec. 1 |
| 4 | Dec. 1 | Dec. 1 |
| 5 | Dec. 1 | Dec. 2 |
| 6 | St. St. | Dec. 2 |
| 7 | Dec. 1 | Dec. 2 |
For the right side, reverse the decreases in A + B. Cast off the last stitches on both sides.
Sleeves
This is where I finally discovered knitting calculators exist, so these directions won't seem as complicated!
Cast on 36 Sts. Inc. 1 St and the beginning and end of each row every 6th row 10 times. (60 rows = 20 increased Sts.) 56 Sts.
Inc. 1 St at the beginning and end of each row every 7th row 6 times. (42 rows = 12 increased Sts.) 68 Sts.
Raglan Decreases
Dec 1 St at the beginning and end of each row for 6 rows (6 rows = 12 Sts. Decreased)
Dec 1 St at the beginning and end of each row every 2nd row 19 times. (38 rows = 38 Sts. Decreased) 18 Sts. remain
Sleeve Cap
There are 8 more rows to be knit (and unfortunately these raglan sleeves are not symmetrical!), the Back side of the Sleeve will be referred to as C and the Front side as D. C + D should be worked at the same time.
| Row | C | D |
|---|---|---|
| 1 | Dec. 1 | CO 4 St. |
| 2 | St. St. | Dec. 1 |
| 3 | Dec. 1 | Dec. 1 |
| 4 | St. St. | Dec. 1 |
| 5 | Dec. 1 | Dec. 1 |
| 6 | St. St. | Dec. 2 |
| 7 | Dec. 1 | Dec. 2 |
| 8 | St. St. | Dec. 2 |
For the second sleeve, reverse C + D. Cast off the last stitches on both sides.
Seaming
Machine sew or hand sew the sleeve caps of both sleeves to the front and back. Sew up the side seams from the waist to the sleeve cuff.
Neck
Pick up and knit the number of stitches along the neckline with the circular needle (I didn't write down the exact number I used, but it has to be a multiple of 4 so you can make a 2 X 2 rib pattern). Place a marker where you start picking up Sts. You will need to pick up the 22 sts. on the back holder and the 14 Sts. on the front neckline along the way. Once all Sts. have been picked up, proceed to knit in the round in a K2P2 ribbed pattern for about 3/4 of an inch. At St. marker, continue in St. St. for about 1.5". Cast off on larger needles.
Block your new sweater if you wish - I've been to lazy to do that yet, but it's an important step in getting all your stitches to lay smooth and flat! Enjoy wearing throughout the fall and winter!
I'm sure as it keeps getting colder more knitting posts will be inevitable...but so be it.

